Showing posts with label Sweet Treats. Show all posts

Tuesday, 24 September 2019

Walnut Cookies (gluten free)

These cookies are very much in the shortbread style, soft and buttery. The dough is also very soft so that it can be piped, although, I have included other methods of assembling the cookies so that you can choose whichever is easiest. It is a good idea to refrigerate /freeze the cookies as this helps to stop them spreading.


Version 1


Version 2 unbaked


Version 2 baked


Version 3


Walnut Cookies (Gluten Free)
These biscuits are very easily made in a food processor. Place all ingredients except walnuts and flour and process together, and then add flour and walnut meal and pulse until the dough forms a ball
Ingredients
250 g soft butter
2/3 cup icing sugar
1 egg
1 tablespoon vanilla extract
1/2 teaspoon baking powder


2 cups gluten free flour
1 cup ground walnuts (approximately 1 ½ cups before grinding)

Extra icing sugar for dusting


Method
Grind walnuts, set aside.
Cream the butter and icing sugar together.
Add egg, vanilla, baking powder and mix well
Stir in flour and ground walnuts and mix well until dough forms. It will be very soft.
Follow the instructions below for shaping cookies.
Bake at 160 deg C until just starting to colour, approximately 15 minutes.
Remove cookies from oven, dust with icing sugar and allow cookies to cool on the tray.
When cool transfer to a cooling rack until completely cold. Store the cookies in an airtight container.
Version 1
Use a large star nozzle to pipe dough onto trays lined with baking paper. Refrigerate for at least 30 minutes as this helps prevent cookies from spreading.
Version 2
Drop heaped teaspoons of dough onto tray lined with baking paper. Refrigerate for at least 30 minutes as this helps prevent cookies from spreading.
Version 3
Refrigerate dough for at least 30 minutes. Scoop out heaped teaspoons of dough and roll into small balls. Place on trays lined with baking paper and then flatten each ball a floured (gluten free) fork. Refrigerate again as this helps prevent cookies from spreading


A snap of me with the cookies at my recent bookmaking workshop,  thanks to Liz for the photo.

Thursday, 30 April 2015

By Request - Cookies n Cream Cheesecake Slice

I can take a hint. You haven't made that cheesecake slice thing with the chocolate biscuits for awhile says the man of the house. The slice was made and consumed with some help from the knitters. So by request, both the slice and the recipe.


Cookies n Cream Cheesecake Slice
Base
125 g butter
100 g dark chocolate
1 pkt Marie biscuits finely crushed

Topping
250 g butter, soft
250 g cream cheese
2 teaspoons vanilla extract or more according to taste
1 cup castor sugar
2 teaspoons gelatine
2/3 cup boiling water
1 packet Choc Ripple biscuits, crushed


Method
Base
Melt butter and chocolate together

Add crushed biscuits and mix well. 

Press into a greased and lined slice tin and press down firmly. Place in fridge.

Topping
Sprinkle gelatine over boiling water, allow the gelatine to dissolve/ soften and mix well.

Place butter, cream cheese, sugar and vanilla and gelatine mixture into a bowl. Beat until smooth.

Gently stir in two thirds of the crushed Chocolate Ripple biscuits

Spread topping over biscuit base. Smooth and then sprinkle remaining one third of the biscuits crumbs over the top of the slice

Return the slice to the fridge to set.


Saturday, 21 February 2015

Mocha Hedgehog

Another version of the hedgehog.  In the words of one of my knitting group friends 'the coffee flavour cuts through the sweetness and is a more adult version'. Use less or more coffee according to your taste.


Mocha Hedgehog
125 g butter
2/3 cup caster sugar
3 tablespoons cocoa
1 egg
1 packet (110 g) slivered almonds
1 tablespoon instant coffee
1 tablespoon boiling water
2 teaspoons vanilla extract
1 packet Marie biscuits, broken into smallish pieces

Mocha Topping
125 g butter
1 large block dark chocolate (I use 200 g block dark chocolate)
1 tablespoon Instant coffee dissolved in 1 tablespoon boiling water

¼ cup flaked or slivered almonds  to decorate

Dissolve coffee in the boiling water.
Melt butter and sugar over low heat.
Add cocoa, dissolved coffee and vanilla. Stir thoroughly and remove from heat.
Add almonds and egg, mix well.
Add broken biscuits, smashing any large pieces as your stir it.
Press mixture into a greased and lined slice tin and refrigerate while making the topping.
Pour the topping over the slice, sprinkle with flaked almonds and refrigerate for several hours/overnight.
Cut into smallish squares and place in an airtight container. Store slice in the fridge.

To Make the Mocha Topping
Dissolve coffee in the boiling water
Melt butter and chocolate together in a bowl over saucepan of hot water or the microwave . I use the microwave on medium power with 45 - 60 second bursts of power.
Stir to mix, add coffee and mix again.


Monday, 17 November 2014

Variations

Frozen raspberries are so versatile and a great way to create a variation of your favourite recipes.  I add them to muffins, bread and butter puddings, fruit crumbles and cobblers and puréed for sauces and in smoothies. The tartness of the raspberries can cut through the sweetness and richness of these dishes.


Pavlova is something that I often make when I need to bring a plate. I mostly get asked to bring a dessert and 'the pav' is always popular. This one topped with puréed frozen raspberries, fresh strawberries, blueberries and crushed Dark Chocolate Tim Tams. The tartness of the raspberries cuts through the sweetness of the meringue.


Chocolate brownies, the go to supper for the knitting group. My standard Brownies recipe with two cups of frozen raspberries and 3 tablespoons of good quality Dutch cocoa. 

Some of the ladies tucking in

.

Tuesday, 4 November 2014

When Too Much is Never Enough - Double or Triple Choc Brownies

I have a confession, chocolate is not a favourite of mine, however, I am always happy to cater to the dedicated chocolate enthusiast.  Recently I made this slice that had chunks of chocolate in it. It was suggested to me that my brownies would also be good with the chunks of chocolate. This is a version of the brownie recipe, I added some cocoa to the mixture as well as the chocolate chunks. The end result was rich and fudgy.


 and then another friend jumped in with the idea that the brownies with chunks of chocolate and that chocolate topping that I put on slices would be even better.


This is why there are  double choc or triple choc brownies being made.When I checked with her and asked too much? Her reply was never.

This recipe makes a large amount of brownies, halve the recipe for a smaller tray.


The triple choc brownies also make a great dessert, serve with cream, icecream - try orange or coffee flavoured or fresh berries.


Double or Triple Choc Brownies

Ingredients Double Choc Brownies

250 gms butter
400 gms dark chocolate/2 large blocks – I prefer 70%cocoa
4 eggs
2 cups dark brown sugar
2 cups plain flour
4 tablespoons Dutch Cocoa
200 g block dark chocolate cut into small chunks or dark chocolate buttons
1 tablespoon vanilla extract (not essence)

To Make Triple Choc Brownies

200 g dark chocolate
1/3 cup cream or 80 g butter
2 teaspoons vanilla

Melt chocolate and cream(butter) together and spread of double choc brownies.

Note
I use butter if I want the topping to set firm and cream for a dessert or when the frosting can be softer.


Method
Place chocolate and butter in glass bowl and melt in microwave. Use medium heat. It should take about 3 minutes. Alternative method, use a bowl over hot water. Stir regularly until mixture is smooth.

Add brown sugar to mixture and stir well, then add vanilla, flour, cocoa and eggs. Mix well

Stir in chocolate chunks.

Place mixture into a greased and lined tin.

Bake at 1600 until firm on the edges and slightly soft in the middle. It will take about 40-60 minutes depending on the depth of the tin. See below.

Allow brownies to stand for a few minutes and then lift out and place on cooling rack.

Cut up brownie and place in an airtight container or jar.


I use a large slice tin - mine is rectangular, approximately 21 cm wide, 29 cm long and 3 cm deep. For a half quantity I use a square cake tin 18cm wide,18cm long and 4cm deep.


Monday, 27 October 2014

Chocolate Pecan Slice

This slice is a little bit like a brownie but not as rich or moist and more cake like. The chunks of chocolate and pecans provide good texture as does the crunchy top that is caused by beating the eggs so much. This slice is best eaten the day it is made which makes it a perfect supper treat for the ladies at my knitting group.


Chocolate Pecan Slice
1 lge block dark chocolate (180 -200g)
250 g butter
1 1/2 cups caster sugar
4 eggs
2 teaspoons vanilla extract

1 cup plain flour
100g pecans
100g dark chocolate broken into small pieces or 100 g chocolate buttons


Method
Lightly toast pecans. I put them in the oven to toast as the oven is preheating.

Melt butter and chocolate together. I use the microwave, med heat with one minute intervals or use a saucepan or double boiler.

Beat sugar and vanilla into melted chocolate mixture.

Add eggs one at a time and beat well. The mixture should trap lots of air bubbles.

Stir in flour, pecans and choc chunks.

Spread mixture into a greased and lined deep slice/lamington tin.

Bake at 170 deg C until just cooked.

Remove from oven and allow the slice to cool in the tin.


When cold, cut into pieces and dust with icing sugar.


Sunday, 26 October 2014

Caramel Icecream with Strawberries in Caramel Balsamic Syrup and Brandy Snap Wafers

Perhaps a bit old fashioned, however, this dessert is super easy to make and can be made ahead and assembled at the last minute. Each of the components are nice on their own but work so well together. The strawberries balance the sweetness of the icecream and the brandy snap wafers. I think of it as a dish of contrasts, soft and smooth creamy icecream, crunchy biscuit, sweet with some acid from the syrup, the firm texture of the berries, I could go on but you can work it out for yourself. Not sure why they are called brandy snaps as there is no brandy in them and the ginger is optional.


I make the icecream first and allow a few hours for it to set and then the brandy snaps, which must be stored in an air tight container as they go soft very quickly. Make the syrup whilst cooking the biscuits and when cool, pour over the prepared strawberries. Leave at room temperature for at least an hour. Leftover syrup can be used again or frozen for another time.

The technique for making the icecream is demonstrated here. For this version I wanted a stronger caramel flavour so I used  1 can of Top n Fill caramel condensed milk and 300 ml of cream. To make the icecream whip the cream until it is softly whipped, add the caramel condensed milk and continue to beat until thick. Do not overbeat. Place into containers and freeze.

I have used this brandy snap recipe for years, it makes a lot but can be halved easily. When I make the mixture I put it in a plastic container and put it in the fridge to firm up. Unused mixture can be stored in the fridge for a few days or frozen.

Brandy Snaps

185 g butter
1/2 cup golden syrup
2/3 cup brown sugar

1 cup plain flour

Optional
1 tablespoon ground ginger


Method
Place butter, syrup and brown sugar in a saucepan and cook on low heat until butter has melted and the sugar has dissolved. Remove from heat and allow the mixture to cool slightly.

Stir in flour and ginger and mix well. Place mixture in fridge to chill. It will become thicker and easier to manage.
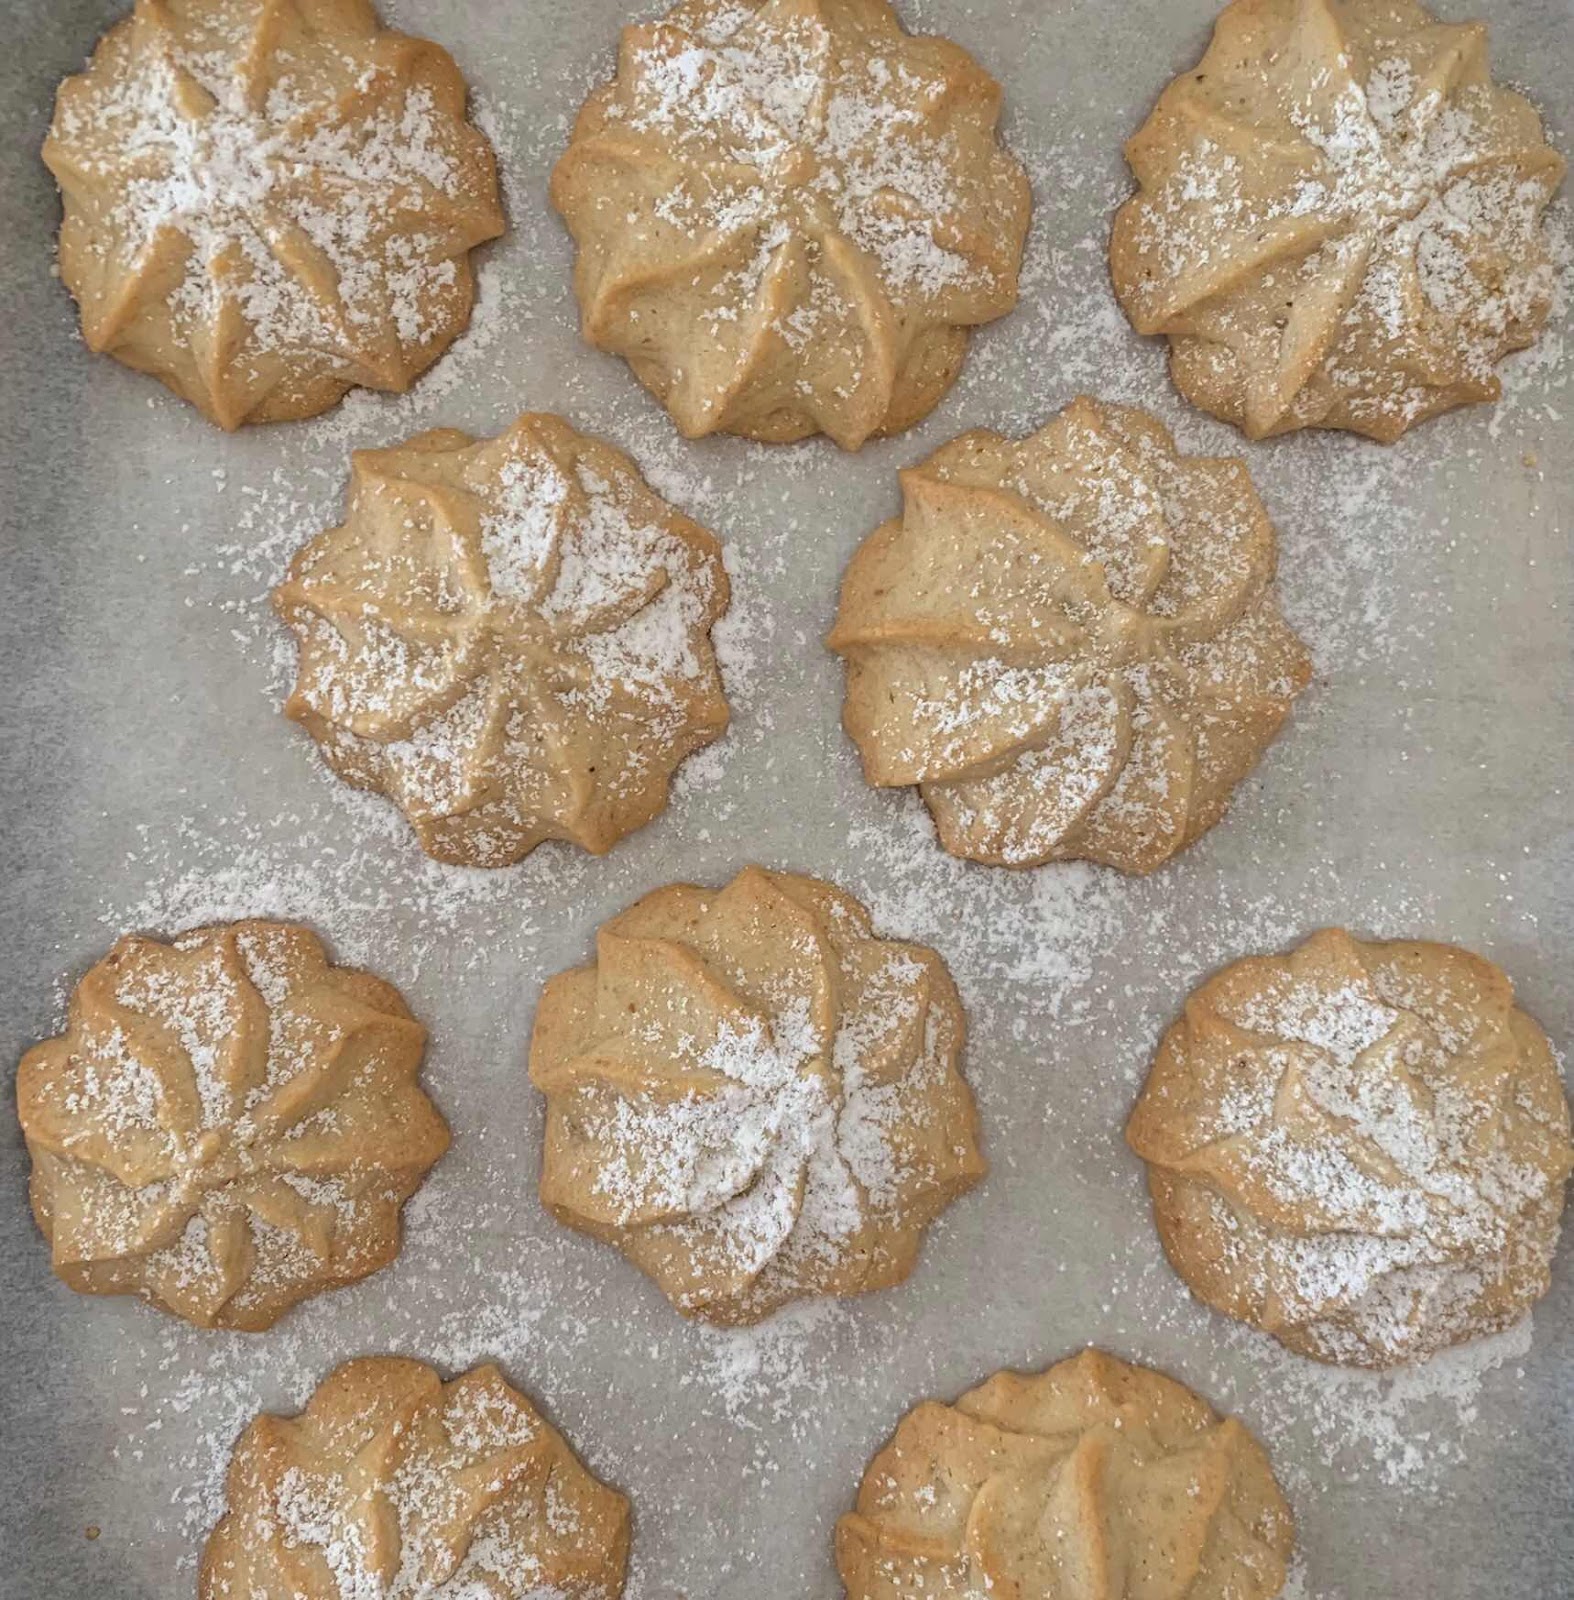
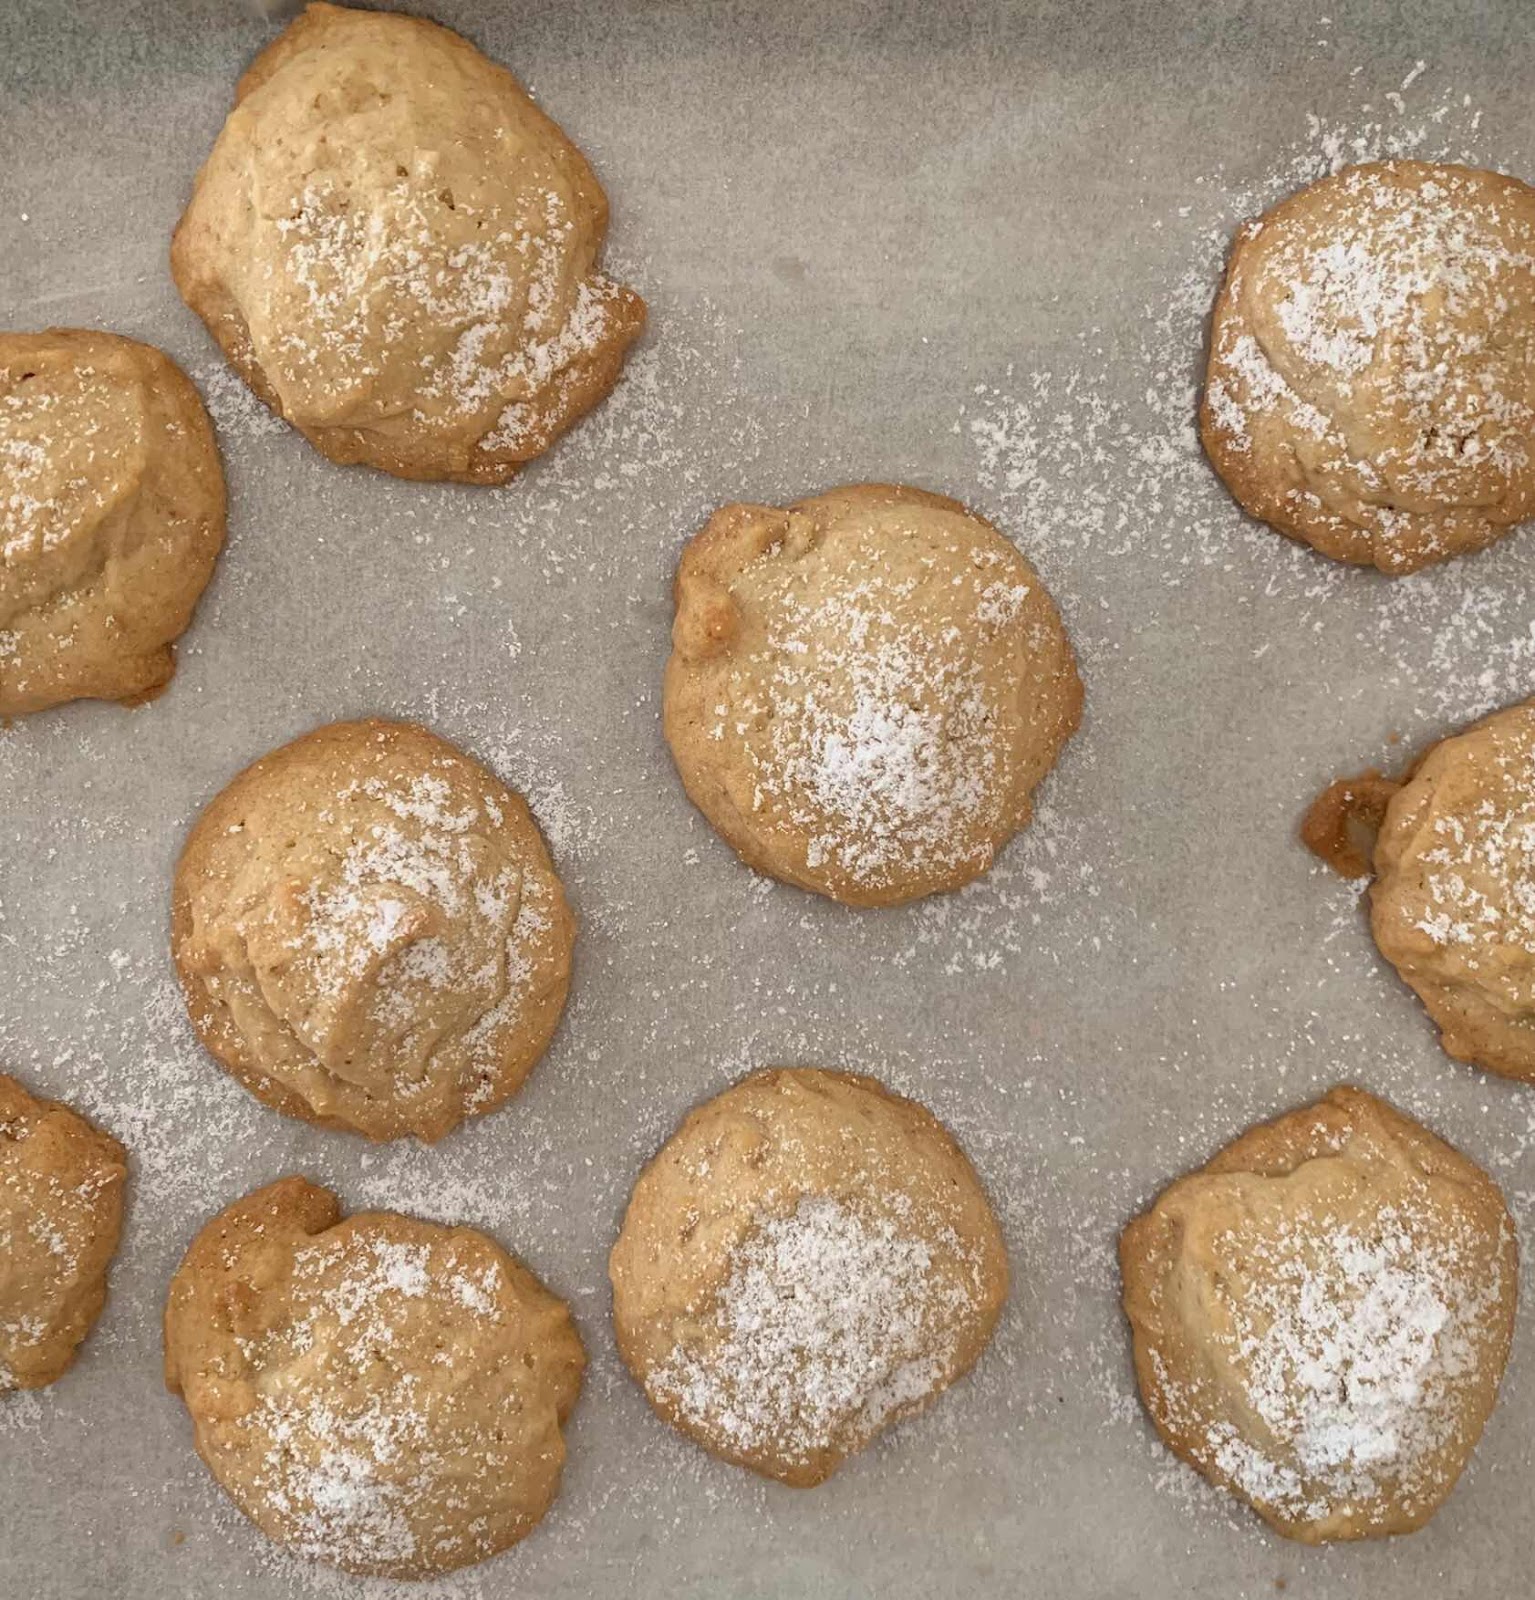
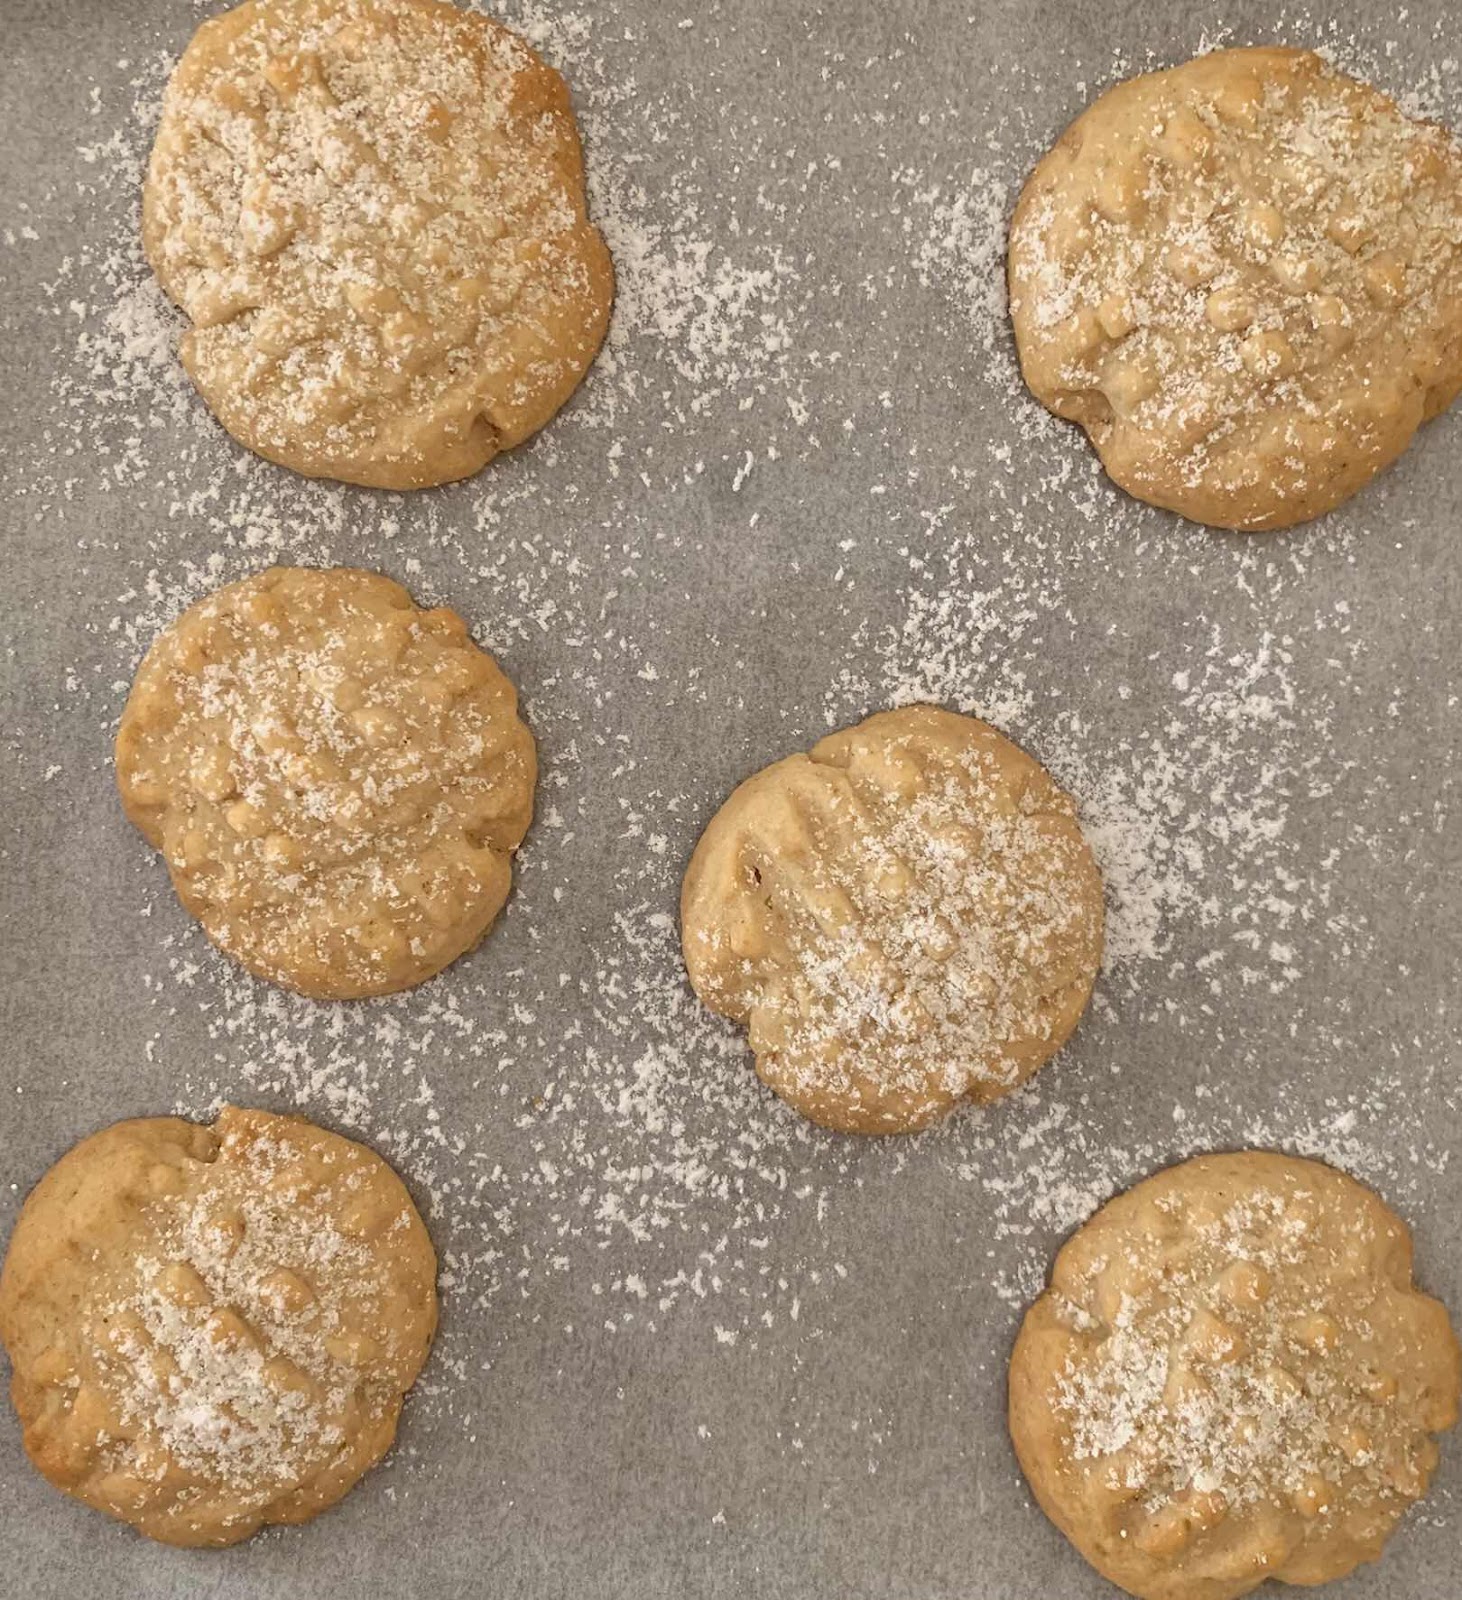
Roll small balls of the brandy snaps and place on greased tray / tray lined with gladbake. Allow room to spread. If making small biscuits place two on each tray or one per tray if large.

Bake biscuits at 175/180 Deg C. Biscuits should have spread into a thin disc and be golden brown. Approximately 5 -7 minutes.

Remove biscuits from the oven and allow to cool on the tray for one minute before removing from the tray.

For Wafers

Remove biscuits to cooling rack and allow to cool.

For Baskets

Remove biscuit from the tray and place over an upturned mould or cup and allow to cool.


Use the baskets for the icecrean or fill with whipped cream and berries.


For Cylinders

Remove biscuit from the tray and roll around the handle of a wooden spoon and allow to cool. The traditional way of serving these is to fill from either end with piped whipped cream.


Strawberries with Caramel Balsamic Syrup

Syrup
1/2 cup sugar
1/2 cup water
2 -3 tablespoons balsamic vinegar
1/2 cup boiling water
Vanilla extract

Berries
2 punnets strawberries,
washed, hulled and sliced into halves or quarters depending on the size


Method
Put sugar and 1/2 cup water in a saucepan, place on low heat and allow sugar to dissolve. Stir occasionally.

Once sugar has dissolved continue cooking until the syrup turns golden brown. Do not stir as you will cause the mixture to crystallise. The mixture will also have become quite thick and syrupy.

Remove from heat, add boiling water and vinegar. Take care as the mixture will bubble up and spit.

Return to heat, stir until fully dissolved. Check flavour, add a little more vinegar if necessary and a little vanilla extract.

Allow to cool and pour over the strawberries.


The new ice cream scoop, very nice to use and a good replacement for the one that has gone missing - presumably it was accidently thrown away.

Monday, 29 September 2014

Prune Clafoutis

This is absolutely delicious and so easy to make, essentially batter poured around fruit and baked. I stew the prunes in light wine syrup. Serve with thick cream or icecream.


Prune Clafoutis

To Stew the Prunes
To make the syrup allow 1 1/2 cups liquid and ½ cup of sugar to each cup of pitted prunes. Put liquid, sugar and prunes into a saucepan and simmer for approximately 10 minutes, allow the prunes to cool in liquid. Add a little extra water if it is evaporating. For this version I used 2 cups water, 1 cup Marsala wine and 1 cup sugar.

Small Dish

1 cup prunes, pitted and stewed
2 eggs
1/4 cup sugar
1 teaspoons vanilla
1/3 cup plain flour
3/4 cup milk

serves 4

Large Dish

2 cups prunes, pitted and stewed
 4 eggs
½ cup sugar
2 teaspoons vanilla
2/3 cup plain flour
1 1/2 cups milk

serves 8 

Method
Grease the dish, I use butter in preference to oil for this. If using oil make sure it is a bland sort such as canola.

Remove prunes from the syrup and arrange evenly over the bottom of the dish.

Beat eggs and sugar together until light and fluffy

Quickly beat in flour and milk and beat again to combine

Pour batter over the fruit.

Bake in a moderately hot oven 180 deg c until the batter is set and the top golden brown.

Remove from oven and allow to cool.


Serve at room temp or just warm. Dust with a little icing sugar just before serving.


This is what it looks like when you spoon it out - the batter should be just set batter and soft squidgy prunes.

Tuesday, 23 September 2014

Sweets for My Sweet

Sweets for my sweet, sugar for my honey, these lyrics from the Drifters sum this up perfectly.


These caramels are soft and chewy, they can be cooked longer to make them harder.  I use  the microwave, mine is ancient so perhaps not as hot and efficient as the new models. it may not take as long to cook. The recipe can also be made in the conventional manner on the stove top. Place ingredients in a medium saucepan and cook on a medium heat, although, you will need to take care not to burn it.  The caramels are very nice without the nuts and dipped into melted chocoloate.

Macadamia Caramels
Ingredients
125 g butter
1 can condensed milk
1 cup brown sugar
2 tablespoons liquid glucose

½ -1 tablespoon vanilla extract
1 -2 cups macadamia nuts, lightly toasted and roughly chopped into halves


Method
Line a tin with non stick baking paper. Place nuts evenly across the bottom of the tin. 

Put butter, condensed milk, brown sugar and glucose in a microwave suitable container.
I use a large pyrex jug with a handle or pyrex bowl although this is more difficult to handle.

Cook mixture on high for two minutes, whisk and cook a further two minutes, whisk, repeat two more times (total eight minutes). The mixture should be starting to boil rapidly and changing colour.

Continue cooking the caramel in one minute intervals stirring between each minute. The mixture should be a rich darkish brown and at soft ball stage.  If not, cook the caramel for a further minute. Test by dropping a teaspoon of mixture into a glass of cold water, the ball of mixture should sort of flatten out or use a thermometer to test.  It should reach about 115 deg c. Remove thermometer before returning mixture to microwave.

Using an oven mitt, carefully remove mixture from microwave. It will be very hot.

Add vanilla, stir well and carefully pour caramel into prepared tray and set aside until cool. When cool mark into squares. 


When completely cold cut the caramel into pieces and refrigerate in a single layer in an airtight container. 


Great when you need a little gift and want to take something you have made yourself. 

Use a cellophane bag tied with ribbon or a small tin for your gift.

Friday, 19 September 2014

Toll House Biscuits

I have been going through my recipe folder, tidying and discardng. So many of my recipes are just a list of ingredients and a few words to explain the technique. This one for Toll House Biscuits is a good example -scribbled on a piece of envelope.  It goes 4 oz butter, 1 cup sug, 1 egg, 2 scant cups SR flour. Beat but & sug, add rest. Mix in 1/2 pkt choc chips and handful walnuts. bake mod slow ov 15 min. I have no idea where it came from or who gave me the recipe but I must have liked the biscuits enough to have written the recipe down.


 Growing up we used a teacup to measure and not a metric cup so perhaps that might explain the two scant cups of flour. The recipe has been replaced with this one - a tested and more user friendly version.

Toll House Biscuits
125 g soft butter
1 cup caster sugar
1 egg
2 teaspoons vanilla
1 ¾ cups SR Flour
½ packet choc chips (1 cup)
1/3 cup walnuts, coarsely chopped
Method
Cream butter and sugar, add vanilla and egg and beat again.

Mix in flour, choc chips and walnuts.

Roll mixture into small balls, place on greased tray / Gladbake and press to flatten slightly. They spread a little so allow space around the biscuits.

Make at 160 deg until pale golden brown, approx 12 minutes.


Cool slightly on trays and then transfer to cooling rack.


Thursday, 18 September 2014

Pumpkin Cake

 If you like carrot cake you will like this. It is an incredibly moist cake, it slices well and will keep for several days in the fridge. I often make it without the cream cheese frosting and serve it sliced and buttered. I like to make it in a square tin as it is easier to cut into small pieces. I have also made it in muffin papers / tins, which cook much faster and are perfect for picnics and packed lunches.


Pumpkin Cake

Cake
1 ½ cups grated pumpkin
1 can crushed pineapple(440g), well drained
2 cups grapeseed oil
4 eggs
1 cup brown sugar
1 cup walnut pieces
2 cups plain flour
2 teaspoons bicarb soda
1 tablespoon cardamom
2 teaspoons nutmeg


Cream Cheese Frosting

125 g cream cheese
90 g soft butter
2 cups icing sugar
finely grated rind /zest of 1 lemon j
1 tablespoon lemon juiceuice

To Decorate
¼ cup walnuts, chopped finely

Grease and line the sides and bottom of 9 inch tin.

Place oil, eggs, sugar, pumpkin, pineapple and walnuts  in a large bowl.  I use an electric hand beater on low to mix them.

Add flour, bicarb soda and spices and mix into the oil. Make sure that it is well mixed, use hand beater on low or med setting.

Pour into the greased and lined tin. The mixture should be no more than two thirds full. If you have a little too much for your tin make a few muffins.

Bake 150 Deg C until a skewer tests clean, approx an hour and a half.

When cooked remove from oven and allow to cool in tin for at least half an hour.

Once completely cold, spread with cream cheese frosting and decorate with finely chopped walnuts.
Refrigerate.

To Make Frosting

Combine all ingredients in a bowl and beat until smooth and fluffy.

Thursday, 11 September 2014

Raspberry and White Chocolate Muffins

After scones, these are my favourite morning tea treat and often requested by friends.They are also good as dessert, remove the papers, warm and serve with a generous blob of cream.


These freeze well, wrap them individually in clingfilm and defrost as needed. Warm in the microwave to refresh them.


Raspberry & White Choc Chip Muffins

Ingredients

Yield 6 large, 9 Regular

125 g butter – melted
½ cup caster sugar
1 egg
¾ cup milk
1 ½ cups plain flour
1Tbs baking powder
1 tsp cinnamon (optional)
1 cup frozen raspberries
1 cup white chocolate/ buttons, roughly chopped

Yield 12 large, 18 Regular

250 g butter – melted
1 cup caster sugar
2 eggs
1 ½ cup milk
3 cups plain flour
2 Tbs baking powder
2 tsp cinnamon (optional)
2 cup frozen raspberries
2 cup white chocolate /buttons, roughly chopped

Method

  1. Sift flour, baking powder and cinnamon if using, into a bowl.

  1. Combine melted butter, sugar, milk and beaten egg, add all at once to flour mixture, and stir to the just combined stage.  Do not overmix.

  1. Add the chocolate and some of the frozen raspberries and mix again.  Do not overwork the mixture.

  1. Spoon muffin mixture into well greased muffin tins or paper muffin cases in muffin trays.

  1. Bake at 210 deg Celsius for approx 20 mins

  1. Dust muffins with sifted icing sugar and serve

Note 1: Hold back some of the frozen raspberries and push one or two into the top of the muffins before baking.

Note 2: Fresh berries can also be used but will break up during the mixing process.

Note 3: Spray muffin papers with cooking spray to make muffins easier to remove from paper cases.


Note 4:  Muffins need to be made quickly and not over stirred or mixed as the texture becomes tough and more cake like.

Tuesday, 9 September 2014

Chocolate Hazelnut Cake

This gluten free cake is a version of the one bowl quick mix cake and is very easy cake to make. It is moist and chocolatey without being too heavy and rich. Sometimes I make it in two sandwich/sponge tins and then join the layers with some Nutella Spread.  It is also very nice as a dessert cake served with some cream or icecream.


I mostly make it in a slice tin as it cooks quicker and is easier to cut into small pieces - perfect for supper at my knitting group


It is also very nice as a dessert cake served with some cream or icecream - a larger, manly sized dessert portion for the man left at home.

Chocolate Hazelnut Cake
(gluten free)
Ingredients
Cake
250g very soft butter
2/3 cup raw caster sugar/caster sugar
4 eggs
2 teaspoons vanilla
3 tablespoons Dutch cocoa
250g hazelnut meal
1 ½ tsp baking powder

Topping
I large block dark chocolate
3 tablespoons cream
2 teaspoons vanilla
3 tablespoons hazelnut meal


I make this in a glass bowl, soften the butter in the microwave until starting to melt and then use the electric hand beater to quickly mix it all together

Method
Cake
Heat oven to 160C fan forced.

Beat the butter & sugar

Mix in the eggs, cocoa and baking powder.

Add hazelnut meal to mixture and mix well.

Pour and spread the mixture into a greased and lined deep slice tin and bake for approx 35/40 minutes

*A greased and lined 20cm cake tin may be used, however, the cake will take longer to bake.

Topping
Melt chocolate and cream together, add vanilla and the hazelnut meal. Mix well and spread over the cake.


Monday, 8 September 2014

Candied Orange & Macadamia Biscuits

An old fashioned style of biscuit, the glace orange peel adds a refreshing flavour, however, they are nice without the peel. The technique for making the peel is explained here and here and is worth the effort; make a big batch and store it in the fridge.


Glace Orange & Macadamia Biscuits
125 g butter
½ cup raw caster sugar/caster sugar
¼ cup finely chopped candied orange peel
¼ cup macadamia nuts, chopped

2 teaspoons vanilla
1 egg
1½ cups SR Flour
Extra macadamias for decoration


Method
Place butter in saucepan and melt over low heat, increase heat and cook until butter starts to foam and turn a light golden brown. Remove from heat.

Add sugar and vanilla, mix well and allow the mixture to cool.

Add egg, flour, peel and chopped nuts and mix until it forms a ball of soft dough.

Roll mixture into small balls, place on a tray lined with cooking parchment. Allow room to spread.

Press a macadamia into each biscuit, slightly flattening the biscuit as you do so.

Bake at 170 deg C until golden brown, approximately 12 minutes.


Cool on rack.

Friday, 5 September 2014

Edie's Strawberry Shortcake

Cheap strawberries at the shops today, was intending to make some jam, however, last minute guests and the need for a dessert meant that the jam did not get made. I used them to make this strawberry shortcake instead. The recipe was given to me by an elderly lady, Edie, many years ago. At the time I was living on a farm that had an enormous strawberry bed and an acre of fruit trees. During the strawberry season many of the desserts we consumed seemed to feature strawberries. Edie was most not a woman to let any fruit go to waste and it was from her that I think I developed my love of preserving.


The cake is sort of like a buttery sweet scone dough and is easer to make as a single layer or individual cakes. It is much nicer with the macerated strawberries. It needs to be eaten fresh, even slightly warm.


Edie's Strawberry Shortcake
Shortcake
2 cups SR flour
125 grams butter
¼ cup caster sugar

2 eggs
200 ml cream


Filling
300 ml cream, whipped
1 punnet strawberries, washed and sliced
or
1 punnet of strawberries that have been mixed with 2 tablespoons sugar, 1 tablespoon balsamic vinegar and 2 teaspoons of vanilla and allowed to stand for an hour or so.

Icing sugar to serve

Method
Rub butter into flour or blitz in a food processor. Add sugar  and mix well.
Mix eggs and cream together and then stir into flour mixture. The dough should be soft but not sticky.
Press into a greased and lined tin 22 cm tin*. Bake 180 deg C until golden brown and cooked (approximately 25 minutes)
Allow to cool in the tin. Cake does not have to be cold.
Split the cake in half. Put the bottom layer on the serving plate, spread with whipped cream, top with sliced strawberries and place the remaining layer of cake on top. Dust with icing sugar.


*The shortcake can be difficult to handle, sometimes I make it as a single layer (use a larger tin so it is not as thick) and put the filling on top, much like a pavlova or I use two smaller tins and make the layers separately. Individual shortcakes are also much easier to layer.
//