Showing posts with label baskets. Show all posts

Friday, 13 November 2015

Felt Pot

For sometime I have been experimenting with different fibres and techniques to create vessels or planter pots. As they are textile based they are not waterproof so need to be placed outside where there will be no damage to furniture. If used indoors they require a waterproof container inside to protect furniture from water and soil damage.


It started out as a piece of knitting approximately one metre by fifty centimetres and knitted in old tapestry wools. The plan was to felt the knitting, tapestry wools are not treated to prevent shrinking in the same way as conventional knitting wools for garments.


The first felting, done in the washing machine (inside a pillowcase with some plastic measuring cups) on a very hot wash produced this


was quite pleased with the result except for this


A few rows that did not felt because I used some odds and ends of conventional knitting yarn.


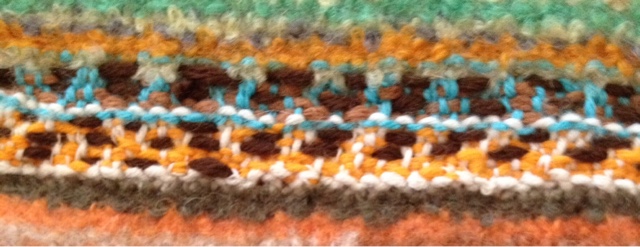
So I used running stitch and stitched tapestry wool into the unfelted areas and felted again.


This time the shape was distorted because of the way the running stitch felted but the felt was thick and colour beautifully muted. Some stitching on the machine and the pot was finished. All I need to do is plant it up


and decide where to put it, perhaps with the concrete cats


or maybe here.

Monday, 21 April 2014

Easter Treats

I love an event or occasion. Easter is perfect for casual or relaxed dining, catching up with people and a legitimate excuse for some chocolate indulgences.  If visiting a fellow crafter I usually try to take a handmade gift and depending on their tastes some chocolates or home made preserves.

This is a basket that I made from sari silks that were crocheted to form a strong rope like material and then stitched to make the basket. A few chocolate eggs and a Lindt bunny to fill it up.


The completed basket with the leftover sari silk rope and another ball of sari silk ready to make another basket. I like to have little baskets at my various workstations, they are great for putting projects into and helping to keep my work areas tidy and a little more decorative than a plastic bag. Perfect for those who work on multiple projects.


For the small folk in my life. Not too much chocolate, a small toy and all contained in a little basket. Wrapped up in a cellophane and tied with a big bow to make transporting them easy.  I buy a few Easter knick knacks at the post Easter sales and store them for the following year.


And for the person who has sworn of chocolate, a mini Simnel cake. A small portion of fruitcake, topped with marzipan and eleven marzipan balls to represent the apostles except for Judas.


Tuesday, 18 February 2014

Little Baskets


I have been making these small baskets, they are reasonably quick to make and add some variety to my crafting. I enjoy learning and perfecting new techniques and investigating how different materials behave. Making a small thing like these baskets is a great way of doing this without the commitment of a large project.

The body of the baskets are made from a variety of materials, mostly twisted fabric. They are sewn together using string of different weights, embroidery thread or thin strips of fabric.

2cm wide strips of calico, sewn with heavy kitchen string
window sashing cord, coiled and then sewn together with heavy kitchen string
several fine strips of silk organza twisted together and then sewn with a single organza strip
1 cm strips of calico twisted with fine brown rope, sewn with kitchen string
twisted dressmaking patterns/tissue and thick brown string
This one is made from strips of sari silks, sewn with double thickness embroidery thread. The jewel or bright colours are gorgeous and the finished basket very soft which makes it fun to bend into different positions.  The top edge with a series of loops.


The most recent one is crocheted. I used up the last of the awful wool that was used to make a string bag. A very simple circular base to start and then a matter of using increases to get to the size you want. The sides are worked with minimal or no increases and then decreasing for the shaping and increasing again for the fluted top. I also tried out these ergonomic hooks, very nice to work with.


Thursday, 9 January 2014

Rusty Basket

For the past year I have been picking up rusted metal things. This usually happens as I walk into town or to my local coffee shop for my morning heart starter. The amount of stuff to be picked up is amazing. I have brought it all home and sorted lots of it into collections such as nails, bottle top, wire and my favourite find the bristles from the street sweeper. I mostly use these finds in my ecodyeing and when teaching a class in ecodyeing I need lots. More about this process in another post.                                        
street sweeper bristles

some of the nails sorted by size

bottle tops

Recently, I was asked by a friend to make a handle for a wire basket. She thinks that the basket was originally a cover from a vent to a septic system at her mother's home. Having studied the basket I felt that rusted metal would compliment the the old and worn metal appearance. 
The basket waiting for decoration
My next step was to sort through the rusty stuff and put together a selection of things that could be used. I do a lot of work in front of the television and find it difficult to watch television without a project in my hands. A couple of very happy hours later I was able to pack up the mess and admire the good use of all those found objects.
a selection of wire and rusty bits
The finished basket used up quite a bit of the scrap wire which was twisted around the handle much as you would find a creeper. Bolts, bottle tops and a piece of rusted tin were attached in a type of flower and bow arrangement.
The basket hanging in the apricot tree
close up view of the handle and top of the basket
The basket has gone back to the owner and is hanging in her garden.
//